Showing posts with label guest post. Show all posts

Thursday, 21 March 2013

Guest Post: Essential tips for flawless make-up


Essential tips for flawless makeup

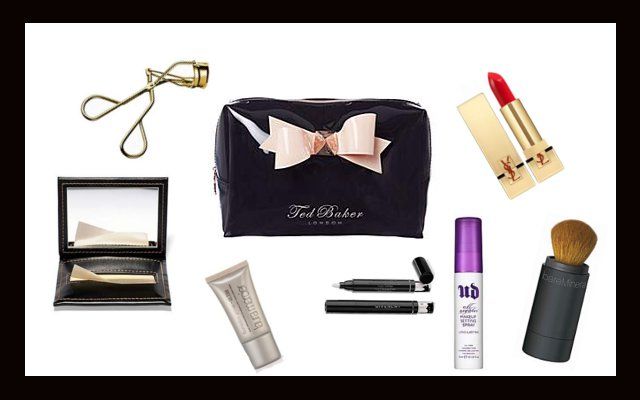
Most girls have their own little tips to keep their makeup looking flawless, whether it is a tip on how to apply it or a tip on how to keep it looking fresh. We all love to know if there are any secrets we haven’t tried yet and because of this I decided to put them all into one lovely post so we can all share in beautiful makeup. Together with House of Fraser and the lovely Chrissy from Beautiful Smudges, we have put together a list of some top tips for all the makeup lovers out there.

Makeup application has to be the part that most ladies would like tips on. Personally I don’t think there are necessarily any wrong ways to apply your makeup it is all about doing what works for you. There are however some things that you can do to make the application easier or last longer which is where we come in:

  • Do always remove your makeup and the end of the day to keep your skin looking fresh and avoid product build up on your skin. Store make-up wipes upside down this way all the liquid falls to the next wipe you're going to use and you never have to struggle with dried out wipes.

  • You can do a great DIY facial just using sugar and water. Let the sugar dissolve and then rub the water on to your face – exfoliating will give your makeup a better base to stick to so try and do it around once a week.

  • When you moisturise rub in an upwards motion to avoid tugging on the skin and any premature wrinkles forming.

  • Clean your makeup brushes regularly but make sure that you don’t wet anything but the bristles as this can damage your brushes and even make them moult.

  • Using your fingers to apply your makeup heats up the foundation and helps it to set better. Alternatively if you like to use sponges, wet the sponge first and this will give you a more even coverage.

  • When applying mascara, stand slightly diagonal to the mirror. This allows you to see all those little baby lashes that you normally wouldn't be able to see and pick up when looking at your eyes straight on.

  • Sometimes eye pencils or lipsticks can become a little waxy, resulting in poor pigmentation and a dragging feeling on the skin. Give them a quick blast with a hairdryer or carry them in your trouser or jeans pockets for a while to warm them up and they will glide much easier.

  • For anyone with small eyes use white eyeliner along your lower lash line this will make them seem much bigger.

  • For anyone who has fine lines underneath their eyes avoid using powder in these areas. The powder will sit in the creases and make them much more obvious.

  • Before applying lipstick rub your lips gently with a damp cloth - this will make your lips super smooth and the perfect base for your product.

  • If you have any scars that you want to cover you need to use products with the most sticking power – these are creams and waxes rather than liquids which will slide off.


Once you have your makeup looking just how you would like it to it is important to keep it that way. Below are a few tips to keep your makeup looking perfect:

  • If you don’t have any setting spray you can mist a fine layer of hairspray over your face – this will set your makeup and stop it from budging.

  • Got shiny skin on the go, but nothing to touch up your make-up? Get a tissue or even some toilet paper, separate the layers and use the thin sheets to blot off excess oil. It works better than some store-bought blotting papers!

  • To set your lipstick try applying a little eye shadow (in the same shade) over the top of your lippy. Not only will this keep your lipstick on for much longer but it will also give you a gorgeous matte effect on any lipstick.

  • To keep lipstick on when drinking, lick the side of your glass where your lips touch. This will stop your lipstick from coming off and sticking to the glass.


I hope you found some of these tips useful and please comment if you have any that didn’t make the list!

Wednesday, 13 February 2013

Guest Post: How To Avoid Fake Tanning Disasters

Some of you may already know that I keep banging on and on about how ridiculously pale I am, making it difficult to find matching foundations and face products. While I do try to embrace my natural skin colour, sometimes I find myself lusting after a golden bronzed glow. There's no denying that tanned skin makes you look, well.. healthier and slimmer as an added bonus.
The problem? We all know how harmful sun rays can be, so I always make sure I cover myself in SPF. The only other option is fake tanning, but quite frankly, I am absolutely terrified of using fake tan. I've never done it before and the potential disasters, such as patchy, orange skin and messy bed sheets have always put me off.
This is where the lovely people over at Beau Bronz come in with a handy list of tips and hints how to avoid fake tanning mistakes - even if you're a complete newbie just like me. Please let me know if you've found this post helpful or if you've even got any more handy tricks you'd like to share!


How to Avoid Fake Tanning Disasters for Complete Newbies

If you’ve never experimented with fake tan before, the whole thing can seem a bit daunting. Sure, we all know the benefits – an all-over glow, an even complexion, and that beautiful sun kissed look – but the dreaded fake tan disasters can put you off even trying.

Here, we’ll take a look at some of the most common tanning disasters, and provide solutions for ensuring that you get to grips with the perfect application in no time at all!

Stained clothing and bedding

Fake tanning products can be intense when they transfer onto materials, and it can be tough to shift the stains. Before applying, make sure that you’ve got some old towels nearby, and never wear your best or light coloured clothing for at least a day.

In the event that you do stain your clothing or bed sheets, wash them straight away on a hot wash.

Streaks and blotches

Streaks and blotches can totally ruin your look, and we’ve all seen tanning disasters in this form. Thankfully, they’re really easy to avoid. By taking the time to exfoliate and moisturise before applying your product, you’ll have the perfect blank canvas for a smooth finish.

If you do find that you have streaks or blotches, use an exfoliator to minimise the problem.

Orange hands

So you’ve achieved your desired bronzed look, but there’s a problem – your palms are bright orange! This is a common complaint, but it’s so easy to prevent. As soon as you’ve applied your tanning product, wash your hands thoroughly, using a little exfoliator on the palms.

If you’ve accidently missed this part out of your tanning regime, you can rectify the problem by using some exfoliator on the necessary areas.

Quick fading

Once you’re bronzed and beautiful, you’ll want to keep your tan looking fresh for as long as you can. One way to do this is by picking a product that builds up over time, rather than something that’s intended for one-off usage.

To keep your skin looking at its best between applications, moisturise every day with your favourite body moisturiser.

By following these tips, you could find that fake tan becomes your new favourite go-to beauty product!

Have you used fake tan before? What tips would you share with other readers who want to give it a go for the first time?

Saturday, 20 October 2012

Guest Post: Kitchen Beautician - A Guide to DIY Beauty

Long time no see! My new life has kept me insanely busy and unfortunately the blogging has had to suffer, but whenever I sit down on the couch getting comfy and cosy and ready to relax with my MacBook, I just end up falling asleep after five minutes!
That's why Anna from NerdWallet has helped me out a little bit with a few handy tips on DIY beauty. We all love luxurious, beautifully scented and packaged beauty products, but I've now learned that sometimes you'd rather have your shower fixed than invest in an £80 cream. I hope you enjoy her tips and ideas!


Anna writes for NerdWallet, a financial literacy website that brings you the best tips to save money on credit cards, travel, shopping and more. Her most recent project is finding the best Black Friday deals to help shoppers get the best gifts for the holidays at the lowest prices of the season. 

Kitchen Beautician

Ladies, it’s no secret; beauty is a big investment. Given that brand-name products range from $20-$100 apiece, it’s not unheard of for the avid beautician to spend hundreds, even thousands, of dollars on beauty products alone each year. But, let’s face it; we can’t always afford to shell out big bucks on pretty palettes and lavish lotions. Did you know that you can whip up – quite literally – cheap and all-natural versions of, essentially, every beauty product imaginable in your very own kitchen? The web is packed with recipes for homemade substitutes for all of your favorite beauty products. We’ll brief you on the essentials.

Makeup
Shopping makeup? Hold it right there. Every girl knows it’s easy to overspend on products we just ‘have to have.’ The next time you run up your makeup tab, consider the amount you could have saved by trying these and endless low-cost, homemade alternatives easily searchable on the internet.
Bronzing powder – Mix your favorite kitchen spices, and what do you get? Seasoning for your favorite Thanksgiving dish or a homemade bronzing powder. Mix cocoa powder, nutmeg powder and cinnamon powder as fit for your skin tone (listed darkest to lightest). Using your fingertips, sift well for an even, clump-free powder mixture. Use as a loose powder or, for a dewy touch, mix a few drops of an essential oil of your liking, such as lavender or rosemary oil. Pat your mixture into a recycled compact case to take with you on the go.
Lip gloss – If you’re like me, you lose lip gloss at almost the same rate you use it. Whether it’s checkout-line chapstick or a brand name tube, it’s likely to slip out of your pocket or just vanish into the abyss by the week’s end – and your hard-earned cash vanishes with it. Now, you can stir up, then stock up on your own quick and easy, all-natural lip gloss, courtesy of The Herb Companion. Just mix 1 teaspoon of aloe vera gel with ½ of a teaspoon of coconut oil and 1/8 of a teaspoon of vitamin E oil (all sold at Whole Foods and other natural foods markets). Melt down a sliver of your favorite lipstick for color, or stir in a drop or two of mint or rose oil for flavored or scented lip gloss.

Skin Care
Take a look at the label of your favorite facial cleanser or moisturizer, and you’ll find that it’s made with essential oils and other natural ingredients, easily obtained at a more affordable price. And, because pure substances can be used at higher concentrations, more often than not, they’re better for your skin. So, when it comes time to replenish your skin care products, get your skin food fix at your local natural foods market.
Moisturizers – Oils are your new miracle workers. Enough said. Learn more about the best oils for your skin type here.
Facial masks – Many foods can be used as either facial masks or toners for cleaner, healthier skin. Here’s a list of 9 DIY facial masks. Chances are you won’t have to spare a penny or even leave your home for them.

Hair Care
With all of its styling tools and products, our hair is known to hold many secrets. Glamorous ’dos don’t come without a price, however. Sometimes it’s better – on your wallet and your scalp – to skip the secret (chemical-laden) potions and opt for au naturale upkeep.
Dry shampoo – According to Organic Authority, cornstarch, baking soda and ground oats can all be used as a dry shampoo for grease and grime-free locks made easy. Just rub a small amount into your roots and comb out the excess.
Conditioner – For natural conditioning, coconut oil does the trick. The latest fad, coconut oil is said to have endless uses, so it may interest you to have a supply handy, sold by the jar at the $10-range.